
We see talks of the DBA role evolving all of the time online. Most of it is hype, some of it is valid observations. But I don’t see many posts on the actual application and practices of what DBAs have to learn as things start to shift to more of an engineering ecosystem.
In this series, I want to take you through this learning curve in real time, figured out as I go. My end goal: set up a fully functional AzDO (Azure DevOps) pipeline that has the ability to fully patch an Always On Availability Group (AG). I’m going to be addressing everything we do as DBAs to ensure that a patching deployment for our SQL Servers goes smoothly. The point of this series is to offer an alternative way for DBAs to approach their day to day roles and responsibilities around maintenance.
Here are my requirements for this project:
- Idempotency.
- Every script needs to be idempotent. That way, if a stage fails, I’ll have the ability to re-run the entire stage without issue or performing unnecessary work.
- Error handling.
- We need proper error handling. Calling PowerShell modules as one-liners is fine when you’re manually running a one-off script, but when you’re baking them in to a fully automated, robust process, an error that doesn’t give you actionable takeaways is useless.
- Source Control.
- We’re no longer storing scripts on servers. We’re going to be using GitHub that our Pipeline will hit to grab and run the appropriate scripts.
- Modularity.
- The more we can split tasks and stages out into their own components makes troubleshooting easier, and re-runnability more feasible.
Here’s the operational flow that I’m after when thinking of how all the pieces connect together:
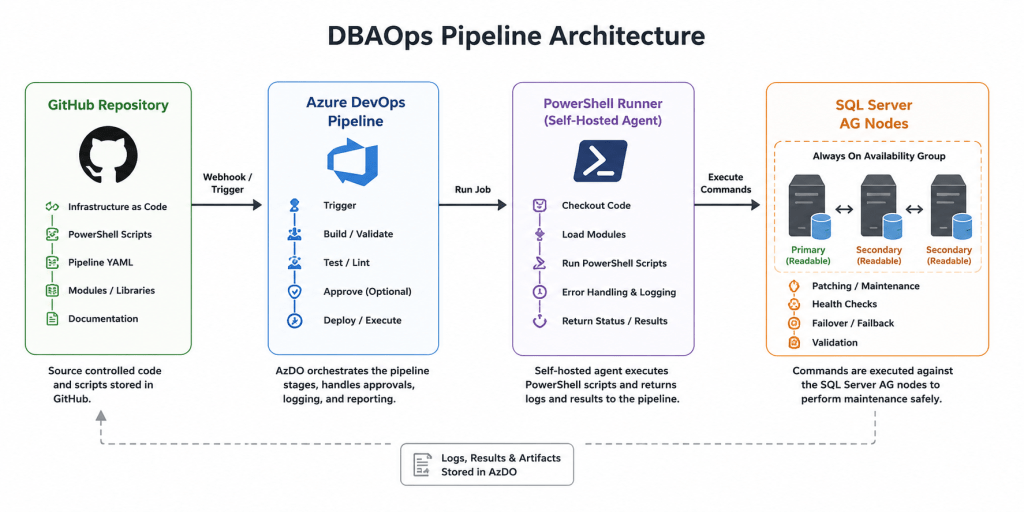
Get Ready, Get Set… Go!
In this first post, we’re going to be starting off simple. I’m going to walk you through how I set up an AzDO project that will host our pipeline.
Step 1: Create An Azure Account
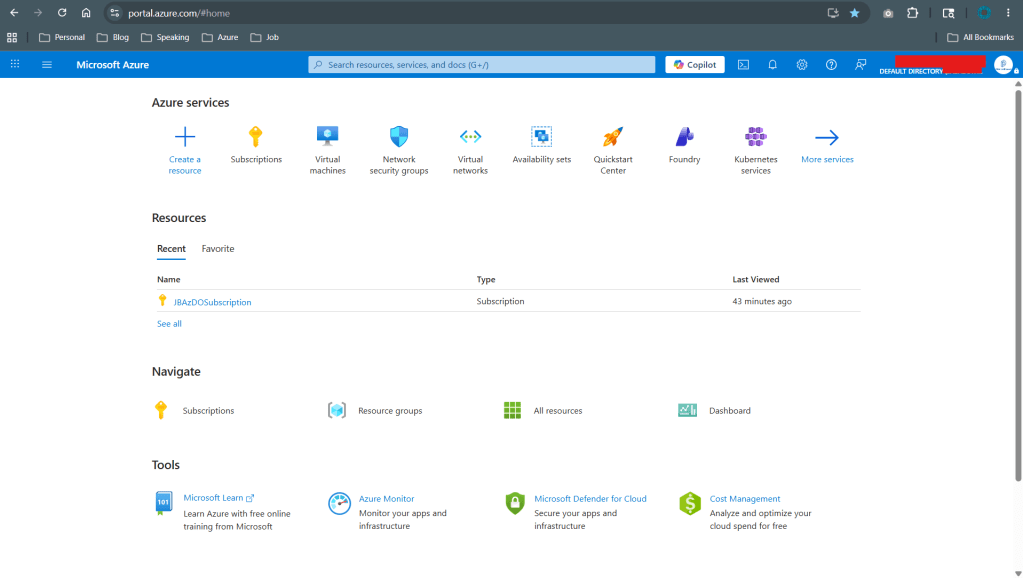
Start off by going to the Azure Portal. If you don’t already have a personal Microsoft account, create one. You’ll be using this throughout this series to be able to log into the Azure Portal and interact with your pipeline. Once you’re in, you’ll see a home page that looks similar to this:
Step 2: Create An Azure Subscription
Note: AzDO will ask you to associate an Azure subscription during organization creation. This is a requirement but you will not be charged for anything we are doing in this series. The free tier covers everything we need.
In order to be able to create an organization to host your pipeline, you’ll first need an Azure Subscription to be able to assign to it. This is a requirement. You shouldn’t need to pay for anything though (if you’re just setting this up for a lab environment that is). Microsoft is pretty generous about the pay-as-you-go setup. Make sure to read up on it, but it should be free as long as you stay within their expressed limitations.
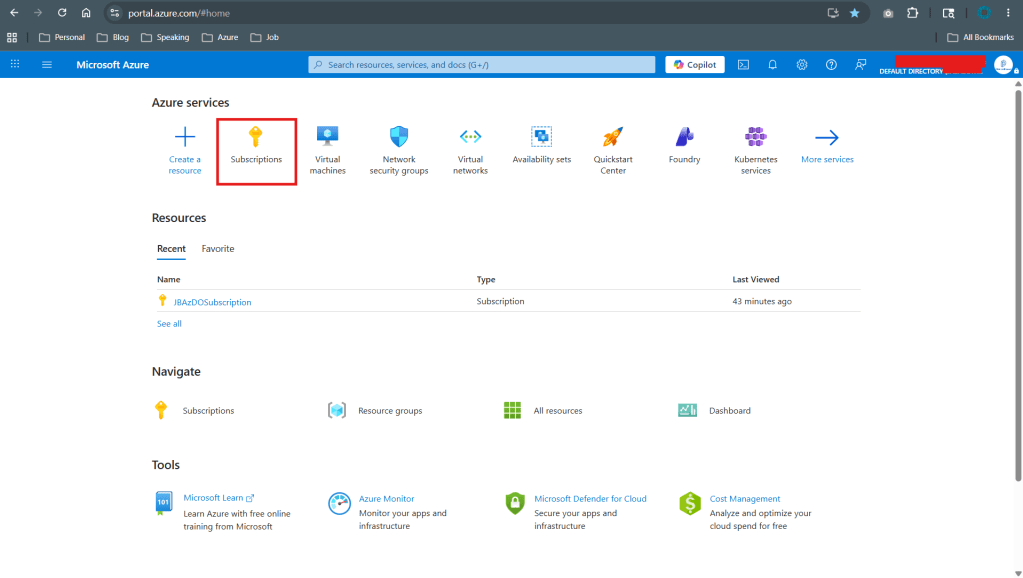
Navigate to the Subscriptions icon towards the upper half of the screen.
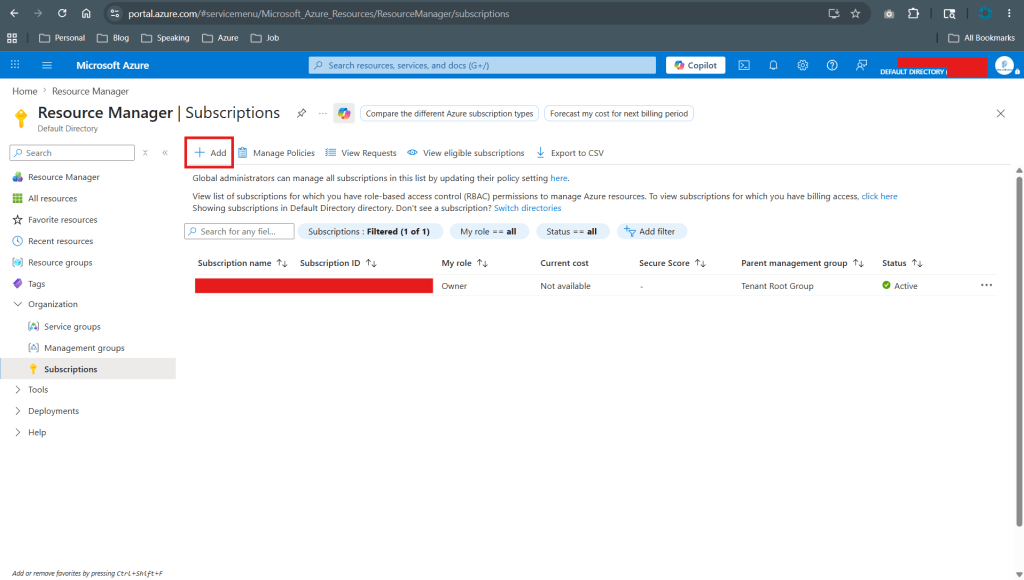
Next, click on the Add button at the top.
In the Create a Subscription section that pops up, you’ll land on the Basics blade. A lot of the fields will be pre-populated for you. The main task you need to do here is give your subscription a name.
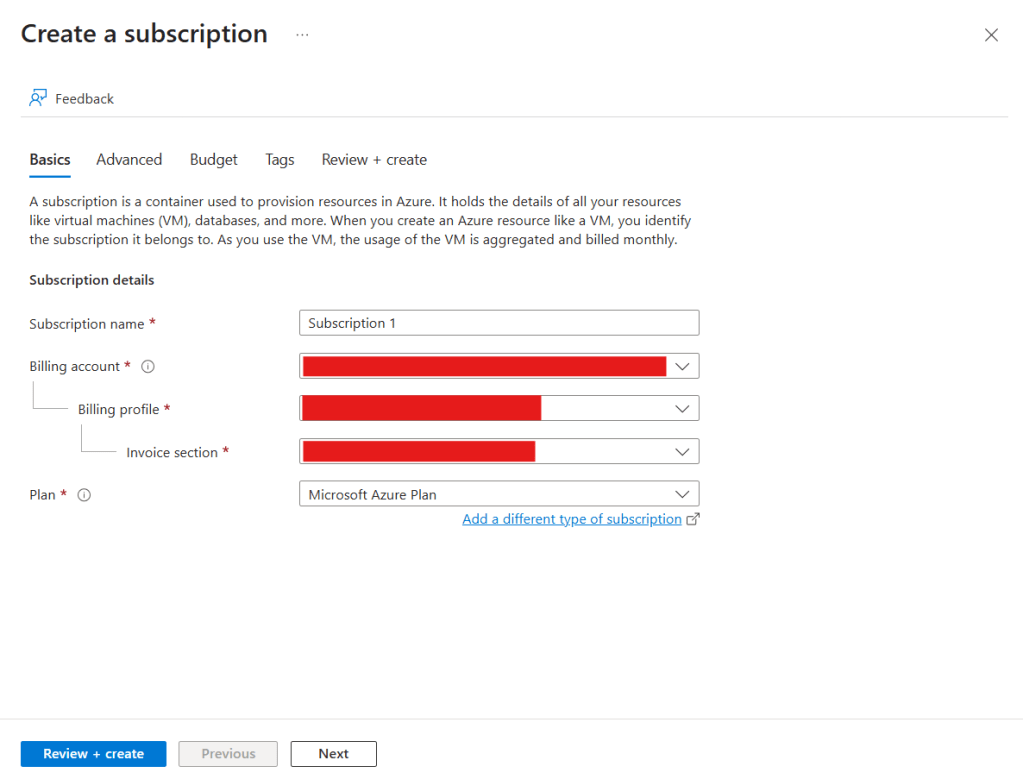
When it comes to choosing a Plan, the Microsoft Azure Plan is the pay-as-you-go default. However, Microsoft offers many plans that can suit your needs, including student plans as well. Click on the “Add a different type of subscription” link below the plan dropdown to view and research their available options.
You can leave everything else in the Advanced, Budget, and Tags blades as they are. However, feel free to modify any values in those should you feel necessary. Everything in those blades is pretty straightforward.
Hit Next until you get to the Review + create blade and finish deploying your subscription. When you’re finished, you’ll see it in your Subscription page in the Azure Portal.
Step 3: Navigate To Azure DevOps
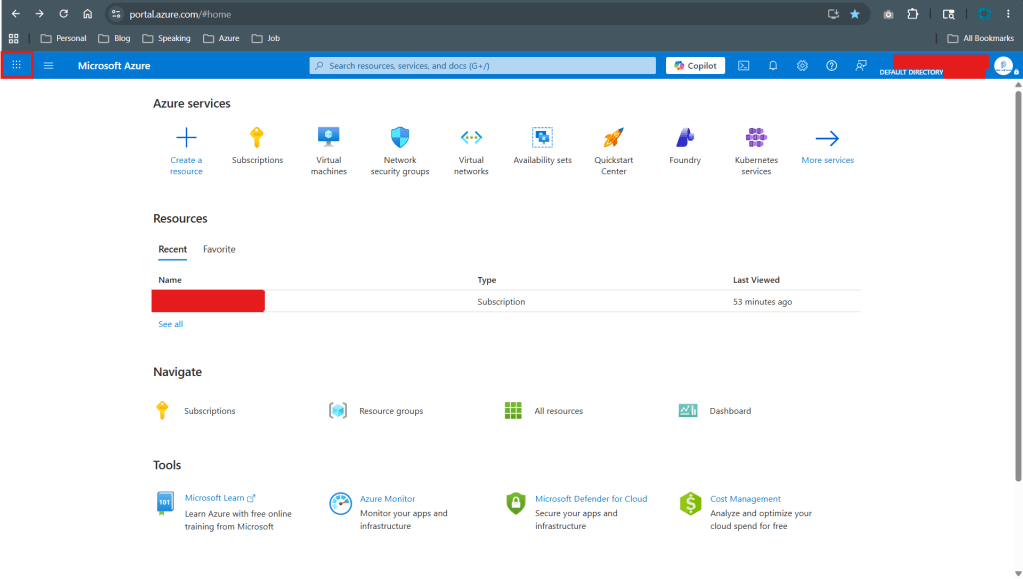
On the top left of the Azure portal, hit the navigation tile box:
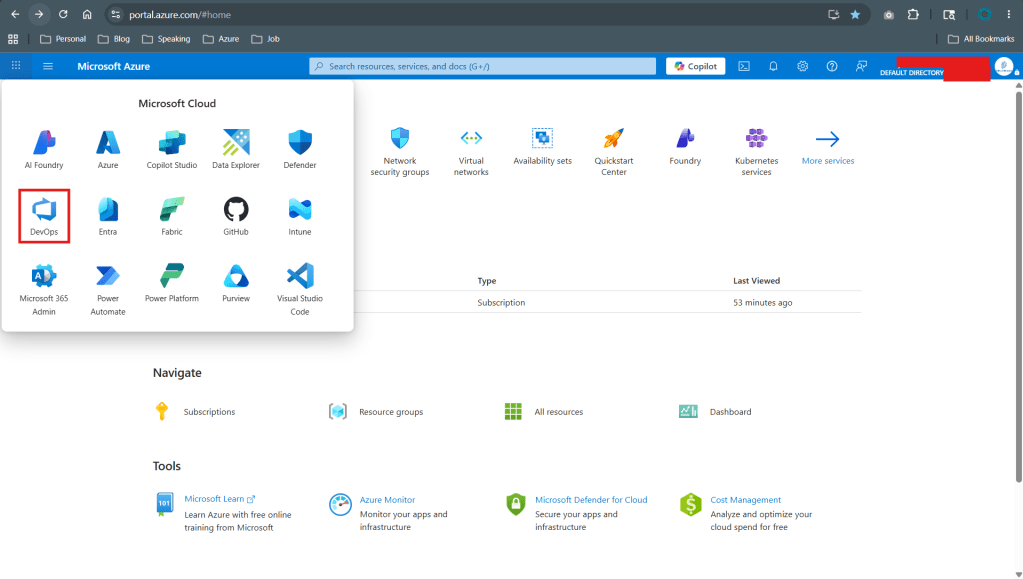
Then, click on the DevOps tile:
Step 4: Create An Organization
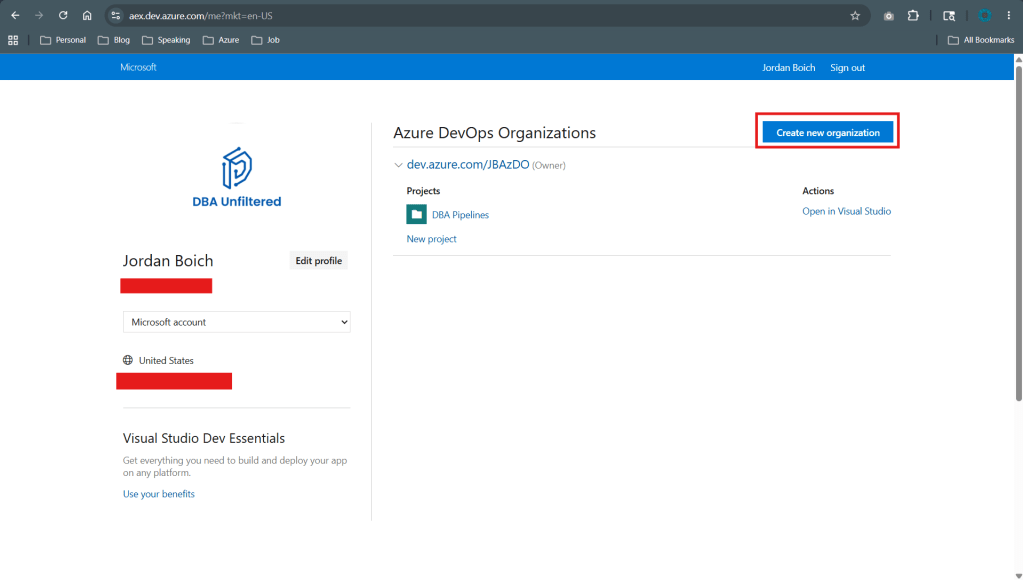
After clicking on the DevOps tile, you’ll land on the page where you can create an organization. This is a requirement in order to create an AzDO project. Click on the Create new organization button. Mine is on the top right because I already have one, but yours may be in the middle of the screen if you don’t have one yet.
Once you hit create, you’ll be routed to a screen where you can either opt in or out of receiving emails from Microsoft about updates and news. Then you’ll land on this page:
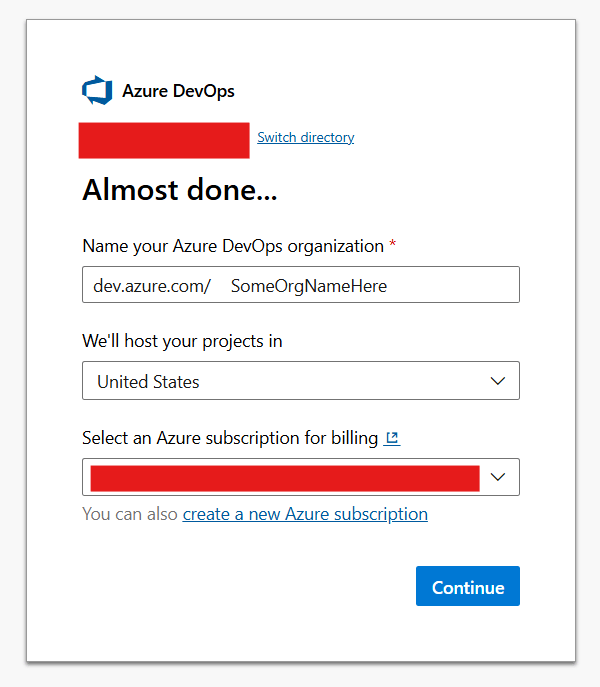
If you completed step 2 above, the “Select an Azure subscription for billing” dropdown will be pre-populated with your newly created subscription. If you don’t have one yet, you can create one on the fly here by clicking the “create a new Azure subscription” link below the dropdown menu.
Give your organization a name and then hit continue.
Step 5: Create Your Project
After you finish creating your organization, it should automatically route you to create a new project. There, you can give your project a name. If it did not automatically prompt you to create a project, you can do so by clicking the “New project” link.
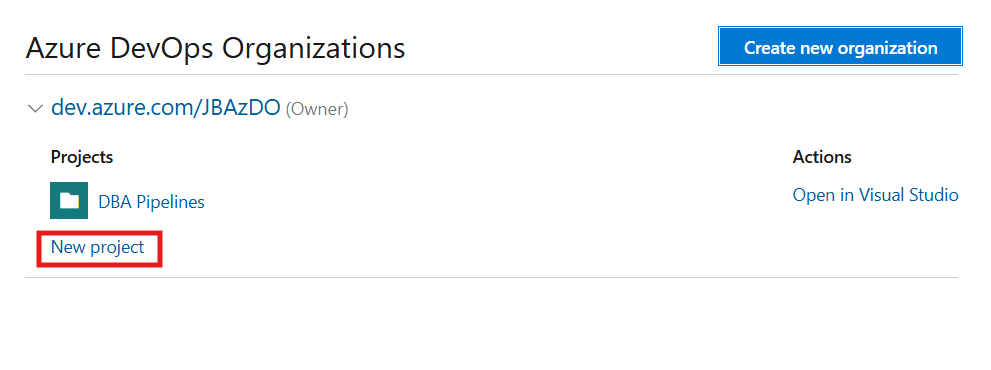
Done!
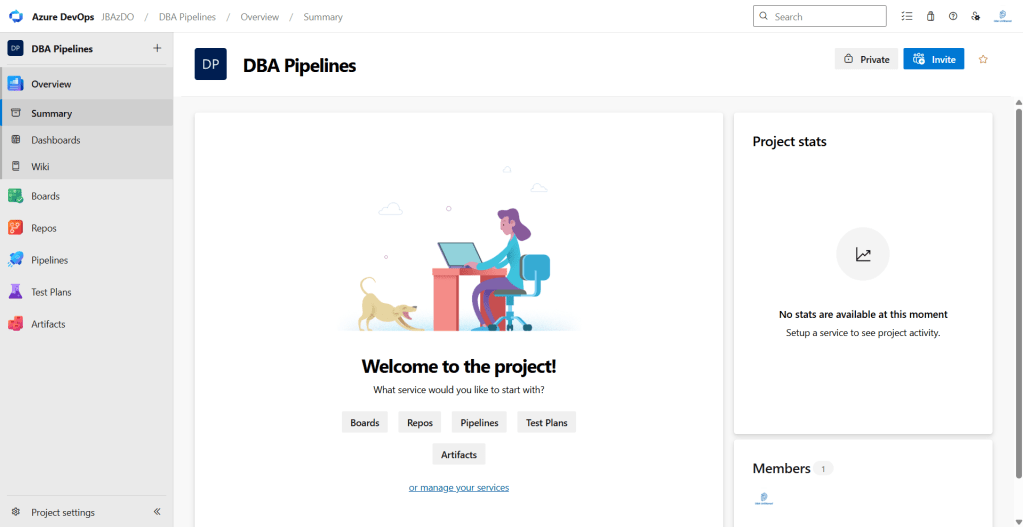
When you click into your new project, your setup should look like this:
Summary
In this first post we set up our Azure accounts, an Azure Subscription, an Organization, and an AzDO Project. In the next post, we will be setting up a GitHub repository and connecting it to our AzDO project so our pipeline can pull our scripts from it downstream.
 DBA Unfiltered
Leave a comment